
How many time have your heard this after you've invited someone to craft/art group-
"Oh, I'm not creative, I can't draw. I can't paint."
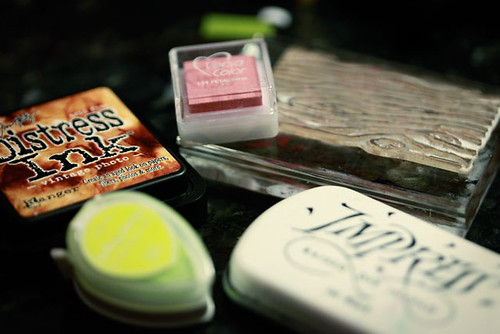
| Image via Interspike |
That just kills me. Nowhere is it written that creativity is limited to drawing and painting. How un-creative would that be? Anyway, when the craft we're exploring today is on the schedule and I get that lame ol' excuse, I respond with something like, "OK then, we'll cheat."

Even though I love love love scrapbook paper, I'm not a scrapbooker. But this project comes out of scrapbooking. I was browsing some websites for easy painting projects and came across this one, or rather a similar one. You stamp an outline image onto watercolor paper, fill it in with special scrapbooker markers or watercolor pencils, and then create the watercolor effect by painting and blending the pigment with clear water. Scrapbook companies even sell a special "aqua brush", which to my thinking is an empty marker with water on the inside and a foam brush on the end. So not necessary.

In scrapbooking (and those of you who do this can probably share and explain better than I), you color your stamp directly with special markers that have magical powers and then stamp that onto your paper. My understanding is that you breath on the stamp to keep the inks moist. OR you apply the color directly to your stamp and then spritz the stamp with water before stamping onto the paper. That's a very simplistic description and I'm sure that all of you real scrapbook artists out there have suddenly developed a headache, as well as deep pity and loathing for me. My apologies but like I say, I'm not really a scrapbooker.
 |
| Image by Shimelle via Flickr |
So anyway, there are a variety of techniques for getting a watercolor effect using stamps but as I thought about it I realized that even large stamps might not do the trick for our folks. First of all, they are expensive. Second of all, not everyone necessarily wants to make the same picture and third of all, the final image is small, even with large stamps. I've never seen an 8 x 10 stamp but think it would be super cool. Send me a link if you find one- I'm sure I can't afford it. So anyway, I thought, "We need to just draw larger images." But that leaves us with the ol' scapegoat "I can't draw." I did actually come across just such a project on Activity Connection using this technique as I was researching the possibilties but their project had the residents drawing the picture first. Again, "I can't draw." So here's what we do:
We cheat!
I don't usually espouse dishonesty but like I tell my patients, sometimes artists just cheat better than we do. So let's cheat! Here's what you'll need:

Watercolor paper
Water-soluable markers- plain ol' school markers but there are so many colors
Paint brush

Watercolor paper
Water-soluable markers- plain ol' school markers but there are so many colors
Paint brush
Coloring pages
You will also need a cup for water and, obviously, some water.
Like most crafts, this one has a bit of prep work. First of all, unless you have a copier or printer that will take larger size paper, you'll need to trim your watercolor paper. The nice cheapie pads of watercoloring paper that our budgets can bear from places like Wal-Mart, Michaels, Dollar Tree come in a standard 9 x 12 size, which is too big to use in most printers or copy machines. And you really do need the watercolor paper for this to work properly. So first trim your paper to letter size (8 1/2 x 11). It's possible to whip out as many of these as you need using a paper cutter.

Next, you need to get your coloring book pictures printed onto the watercolor paper. I used my printer for this so that's what I'll show here. I have a separate folder on my computers for saved coloring pages and links so it's easy to print out pictures when needed. I print a bunch and keep a folder available in the Activity Room with markers, crayons, etc and just re-print more when the folder gets low. So spend some time with the links under the Gardens To Color section of the sidebar to the right and get a nice folder saved up on your hard drive.

Open your image and do any cropping or re-sizing that you would like to do. When you are ready to print, change the settings for your printer under Print Preferences to make the image lighter.

These settings are variously called "Contrast", "Brighter/Darker", "Contrast", "Density". Print your first image on regular paper until you get it as light as you want. Just an FYI- for some software/printers you will need to save the lightened version of your image. In Picasa I always save a lightened version. Picasa is free to download, by the way, and you can do some nice basic tweaking with it.

I also change the Print Quality to Fast Draft or whatever is the lightest density as this uses the least amount of ink. Did you know that printer ink is one of the most expensive liquids in the world? Look at the cartridge and the amount of ink in it. Check the price, multiply to get a gallon. Average cost- $10,000 to $20,000 per gallon. But I digress...
 |
| Coloring book pages from Free Coloring Pages Fun |
I like to print the images out at about 50%. This will give the final picture more of an authentic watercoloring look and less of a "I painted this pre-printed picture" look as the outline ink will not stand out so much. Darker printing also means the ink from the outlined image is more likely to run and bleed into the watercolor image.
I know this project has some techy prep-work to it. If you don't feel up to it, find a volunteer. Or your kid- I occasionally bribe mine to do this sort of thing. If you're super lucky you can just copy the coloring pages on the copier after setting the density to about 50% and the paper to "card stock". Our copier at work tends to jam with the heavier paper so I didn't even bother trying.
 |
| Image by Legozilla via Flickr |
OK, let's get to craft class. After the usual introductions and warm-ups, pass out your makers, brushes, water cups, and pre-printed images. I usually offer a variety of options but keep in mind that some folks just have trouble making a decision, especially with crafts. They're afraid of making the "wrong" choice. Maybe limit your choices between 4-5 images, depending upon your participants. For a general craft group you may want to make sure that your images are not too detailed. There are so many coloring pages out there that offer "grown up" images to color. Check out the link list on the sidebar to the right for tons of coloring book pages.
It is helpful to tape the watercolor paper directly onto the table with a low-tack tape such as painters tape or even masking tape. Just tape all the way around the edges. When doing a watercolor painting, the paper is usually stretched ahead of time, which involves briefly soaking the paper and then taping it down to let it dry. This won't work for our project today as the pre-printed image could easily wash off so we'll do the way I just described instead.

The very top secret key to this project is that it is not necessary to fill in the entire image with the marker. In fact, just outlining a portion of the image will give very nice watercolor-y results. You can add a second accent or highlight color at this time also. So demonstrate or pass around an image that you have done that shows how the image is only outlined. For some folks this is a hard idea for some folks to grasp so having a picture that is only outlined helps. It is even better to demonstrate so yippee! you get to make a couple of these ahead of time-- play play play. Feel free to print any of the photos in this post if you would like to use them as visual aids but please do not use them for anything other than your craft class. Thanks.
You can outline the entire picture before going to the next step or do one section of the image at a time. For example, outline and "paint" the petals then do the stem, then the background. Be advised, however, that the pigment doesn't flow as nicely if the markers are left to dry for too long. It's a one session project.
OK, so now you've outlined where you want. Next, use a very wet brush to dampen the marker pigment and "paint" into the other areas of the picture. Start with the pigmented areas and work outward. You can re-wet the brush and go back to pick up more pigment if needed. Sometimes you're just moving the pigment-tinted water around and that's OK too.

Once an area has been "painted" with the water, any additional pigment that is added will not flow as much as the first application, which is a nice way to add some subtle accents that you might want left darker but it won't add much more pigment over all. You can go back and add highlights and accents with or without adding additional water.

And...

... flower done! You can leave it this way or fill in the background, which works under the same principle as doing the flower.
Outine the edges of the background with the marker. The less you color the background, the lighter it will be as you pull the pigmented water away from the original marks. This example show two colors but one or three or the-sky's-the-limit is great.

Do you notice the crumbly looking stuff on the image on the right, above? If you use a stiff brush and "scrub" at the paper a bit to get the pigment to flow and blend some of the paper comes up and gets "crumbly." This brushes off easily when the picture is dry but try to discourage scrubbing at the paper. Um, I did that on purpose, just to demonstrate. Really.
So let's take a look at some of the watercolors "my" folks have created:


 |
| Coloring page from Activity Connection |

 |
| Coloring page from Activity Connection |

 |
| This patient added a flower for her butterfly to rest on. |


As you can see by the comparisons below there are as many results and skill levels as participants. It's all good.


And I'm forever raving to my folks about how anything, even your 2nd grade report card, looks so legit when framed. So if you have some photo mats from the Dollar tree or even cut out from posterboard, it's a nice way to display your residents' artwork.

So go stock up on markers and paper and get your residents busy cranking out fabulous watercolors. Can you imagine how great a resident would feel to be able to give Christmas presents of their artwork, as well as how touched the recipient would be? Go go Go- get painting.
Let me make a quick comment about the Print Friendly button right below the end of this post. If you click on that it will take you to their web page and there's a big ol' place for you to copy and paste the URL for this post (you'll need to click on the title of this post to get that- otherwise you'll get who knows how much stuff). It will load the page without the sidebar, etc and then you can edit out any photos and chit chat that you would like in order to get a print friendly version of this post. Instructions without all the jibberish, and I know I always have alot of that. It says posted by Chrysalis- that's me from my other blog.
Thanks for stopping in. It's been an incredibly busy spring and I've missed not being able to post but other things have had to take priority. Please do stop back in.

No comments:
Post a Comment